How I host Django projects on Railway
I moved away from VPSs to hosing everything on Railway. I don't like DevOps.
For years I have hosted my Django projects on VPSs on Digital Ocean, UpCloud or Hetzner, giving me raw access to the servers, but also a lot of DevOps work I didn't really want.
With the recent rise of PaaS options like Vercel, I wanted to see if I could run Django on a platform that would take all the DevOps tasks off my plate so I could concentrate on building my small fleet of web products.
Sending code to GitHub and having that pushed live automatically for deployment is also really attractive.
With some research, I found Railway to suit my needs the best. I now have four Django projects on Railway.
This is how I set everything up.
You can also use this guide when starting new Django projects but there is also a Railway template that may be faster.
Prerequisites
This guide assumes you have a Django project set up locally on your machine and that project is also hosted on GitHub.
You also need a few packages:
python -m pip install gunicorn whitenoise- gunicorn is the web server
- whitenoise serves static files
Railway config
To get Django running on Railway, you need to add some config files to your Django project.
railway.json
This file is a config file Railway uses for building and deploying your services.
Not much config needed here. If you add too much config here (for example a build command) it will restrict what you can do with your project (see info about crons below).
A lot of the config I add is directly to each resource inside the Railway dashboard.
{
  "$schema": "https://railway.app/railway.schema.json",
  "build": {
    "builder": "NIXPACKS",
    "nixpacksPlan": {
      "providers": ["python"]
    }
  },
  "deploy": {
    "restartPolicyType": "ON_FAILURE",
    "restartPolicyMaxRetries": 10
  }
}
runtime.txt
This file tells Railway which Python version to use.
python -3.9.5.env
This file stores environment variables locally. In Railway, these variables will be handled in the Railway dashboard UI (see below).
DEBUG=True
ALLOWED_HOSTS=*
PGDATABASE=my_db
PGUSER=root
PGPASSWORD=
PGHOST=127.0.0.1
PGPORT=5432
This .env file should be added to .gitignore as it's only used locally (if you have other people committing code, they should create their own .env file).
To access these variables in Python, I like using the django-environ package.
pip install django-environIn my settings.py file I import the package and then can include variables like this:
import environ

# Build paths inside the project like this: BASE_DIR / 'subdir'.
BASE_DIR = Path(__file__).resolve().parent.parent

env = environ.Env()
env.read_env(BASE_DIR / '.env')

# Then import variables, for example

DEBUG = env('DEBUG') == 'True'

ALLOWED_HOSTS = env('ALLOWED_HOSTS').split(',')

DATABASES = {
    'default': {
        'ENGINE': 'django.db.backends.postgresql_psycopg2',
        'NAME': env("PGDATABASE"),
        'USER': env("PGUSER"),
        'PASSWORD': env("PGPASSWORD"),
        'HOST': env("PGHOST"),
        'PORT': env("PGPORT"),
    }
}DEBUG boolean comparison to "True".Make sure to commit all this to your GitHub repo!
Setting up the app resource
Sign up to Railway and create a new project.
Create the app
Create a new service and select GitHub Repo. Connect Railway to GitHub if you haven't already and then select your project repo. This resource will act as your main app.
Click on the resource's Settings tab and add the following as the Custom Start Command:
python manage.py migrate && python manage.py collectstatic --noinput && gunicorn projectname.wsgiInsert your Django project name in place of projectname.
This will make sure that for every deployment, your migrations are run, your static files are collected to be served by whitenoise, and then the app is started using the gunicorn server.
Add a domain
The last step to get your app working is to add a domain so you can access it from your browser.
Scroll up to the Public Networking section and click Generate domain. You can use a free temporary domain on the .up.railway.app subdomain. If it asks for a port, add 8080.
Create a database (optional)
I like to host my database in Railway as well. If you want to do this, create a new database resource.
As recommended to me by a Railway engineer, it's best to use local private connections between your app and database(s) to cut down on egress costs (this can add up quite quickly if your app-to-database traffic is done over the public network).
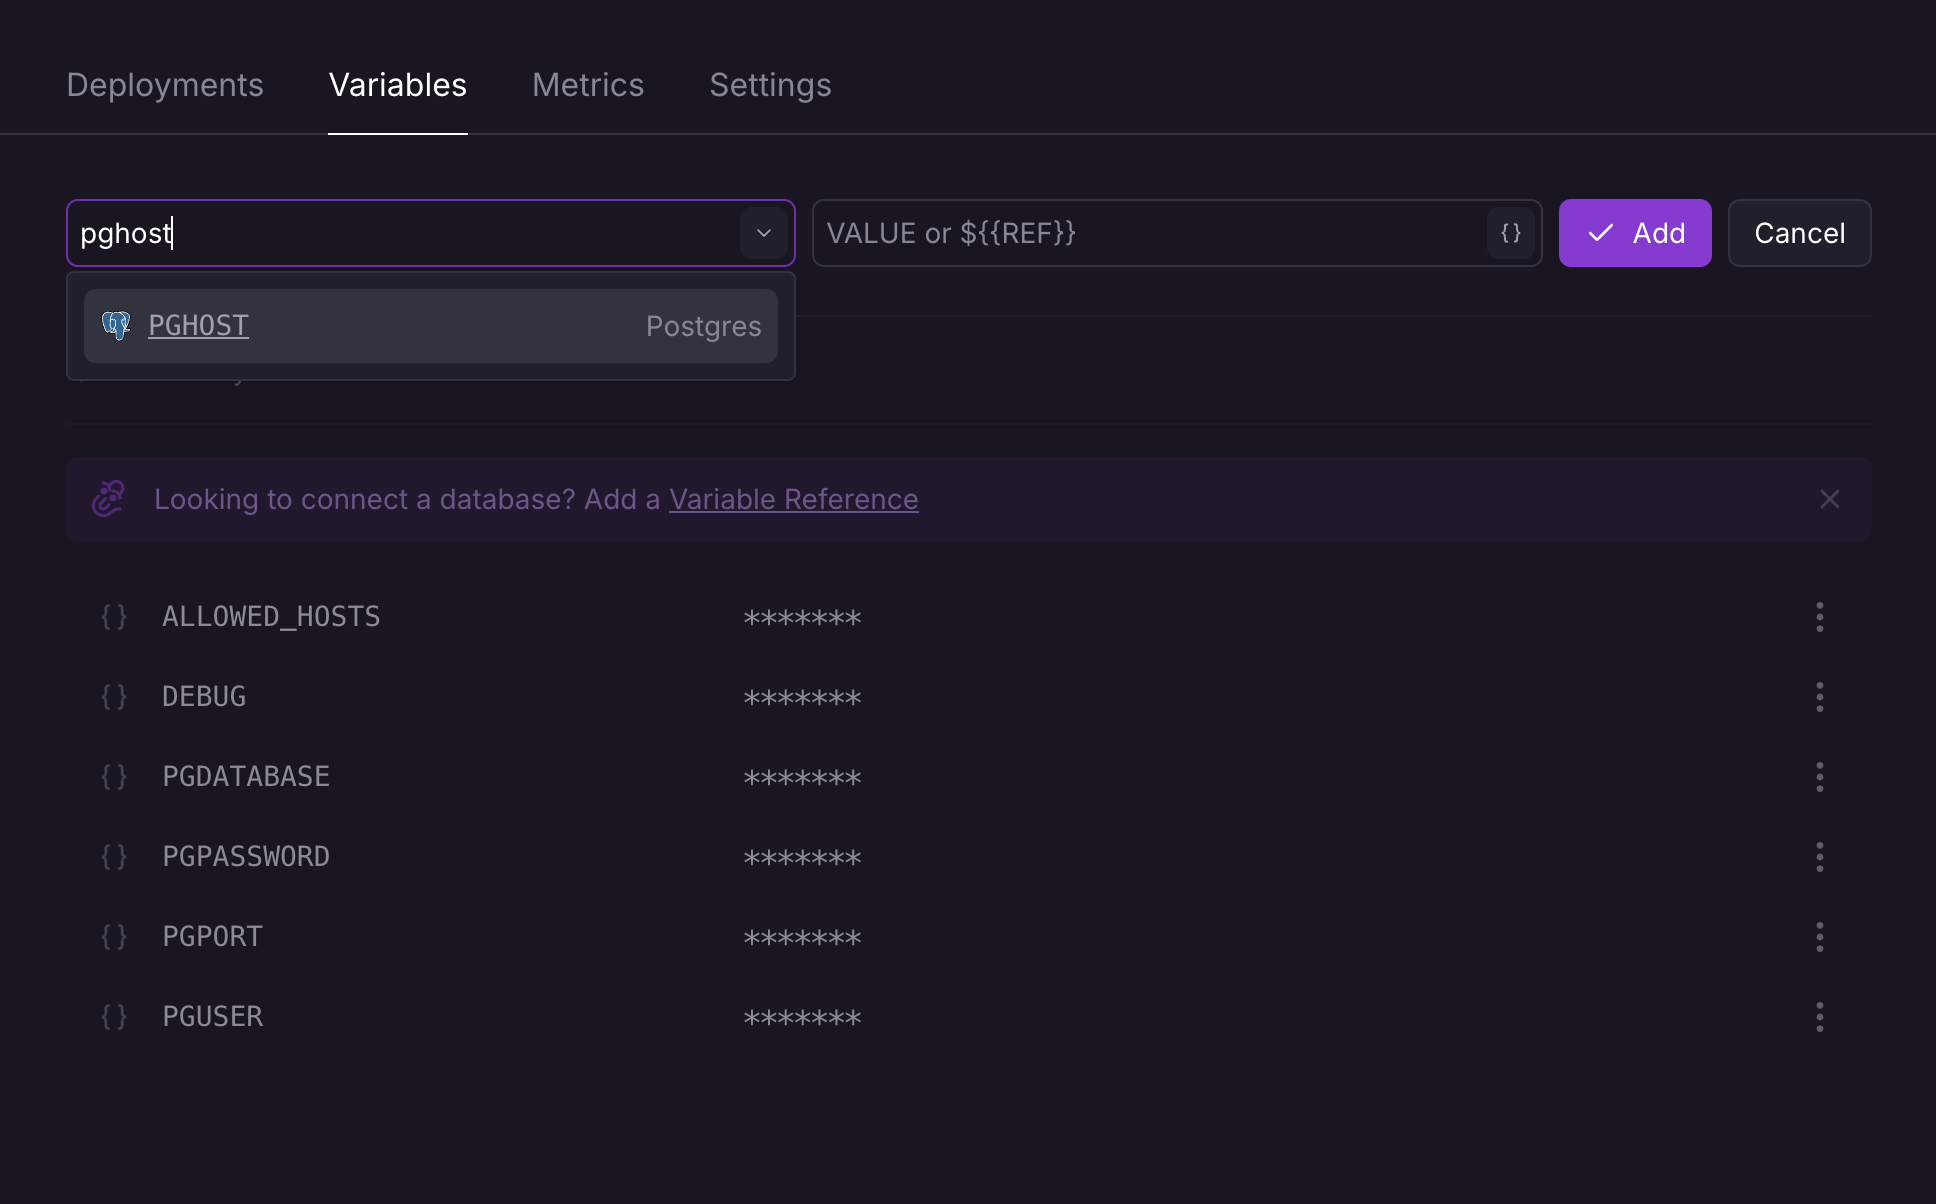
Go to the app resource's Shared Variables tab and click New variable. Start typing each of the database variables from .env like "PGDATABASE" (or click the Add Reference button to see a full dropdown of options). Railway will automatically add in the variable value from your database settings. Click Add or hit Enter to add each variable.

If you host your database elsewhere, just copy and paste your values for each.
Environment and Shared variables
Now add your environment variables to Railway in the Variables tab. You can copy the content from your local .env and paste it directly into Railway, to make things easier.
Make sure that you add every variable used in your code to Railway, otherwise the deployment won't work.
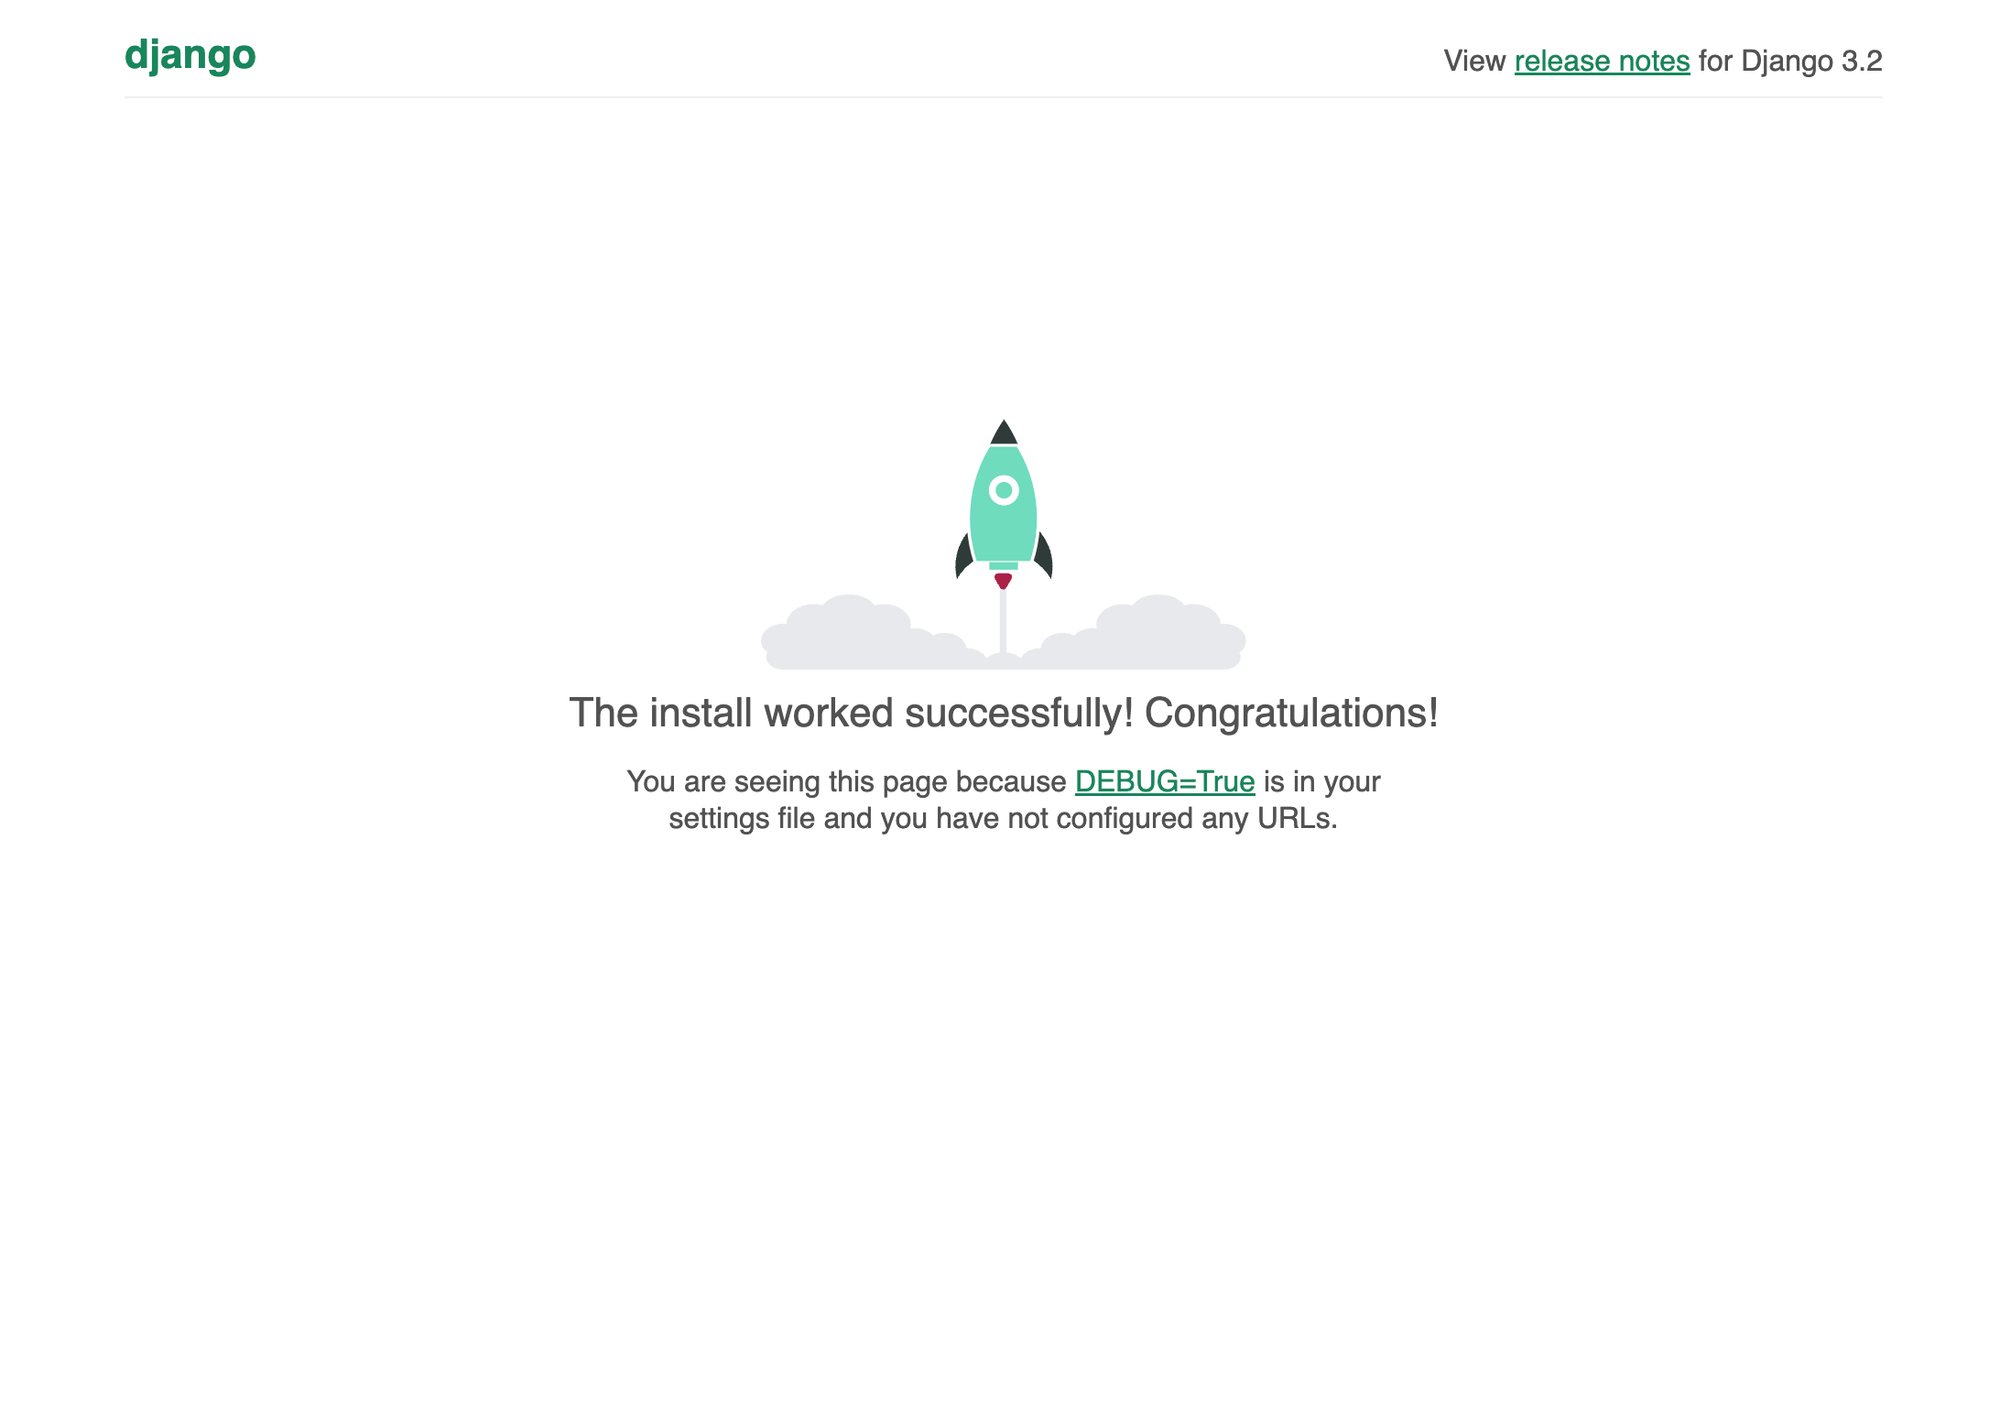
Once you have added every variable, go to your app's URL and you should see your Django app in the browser 🚀

Debugging
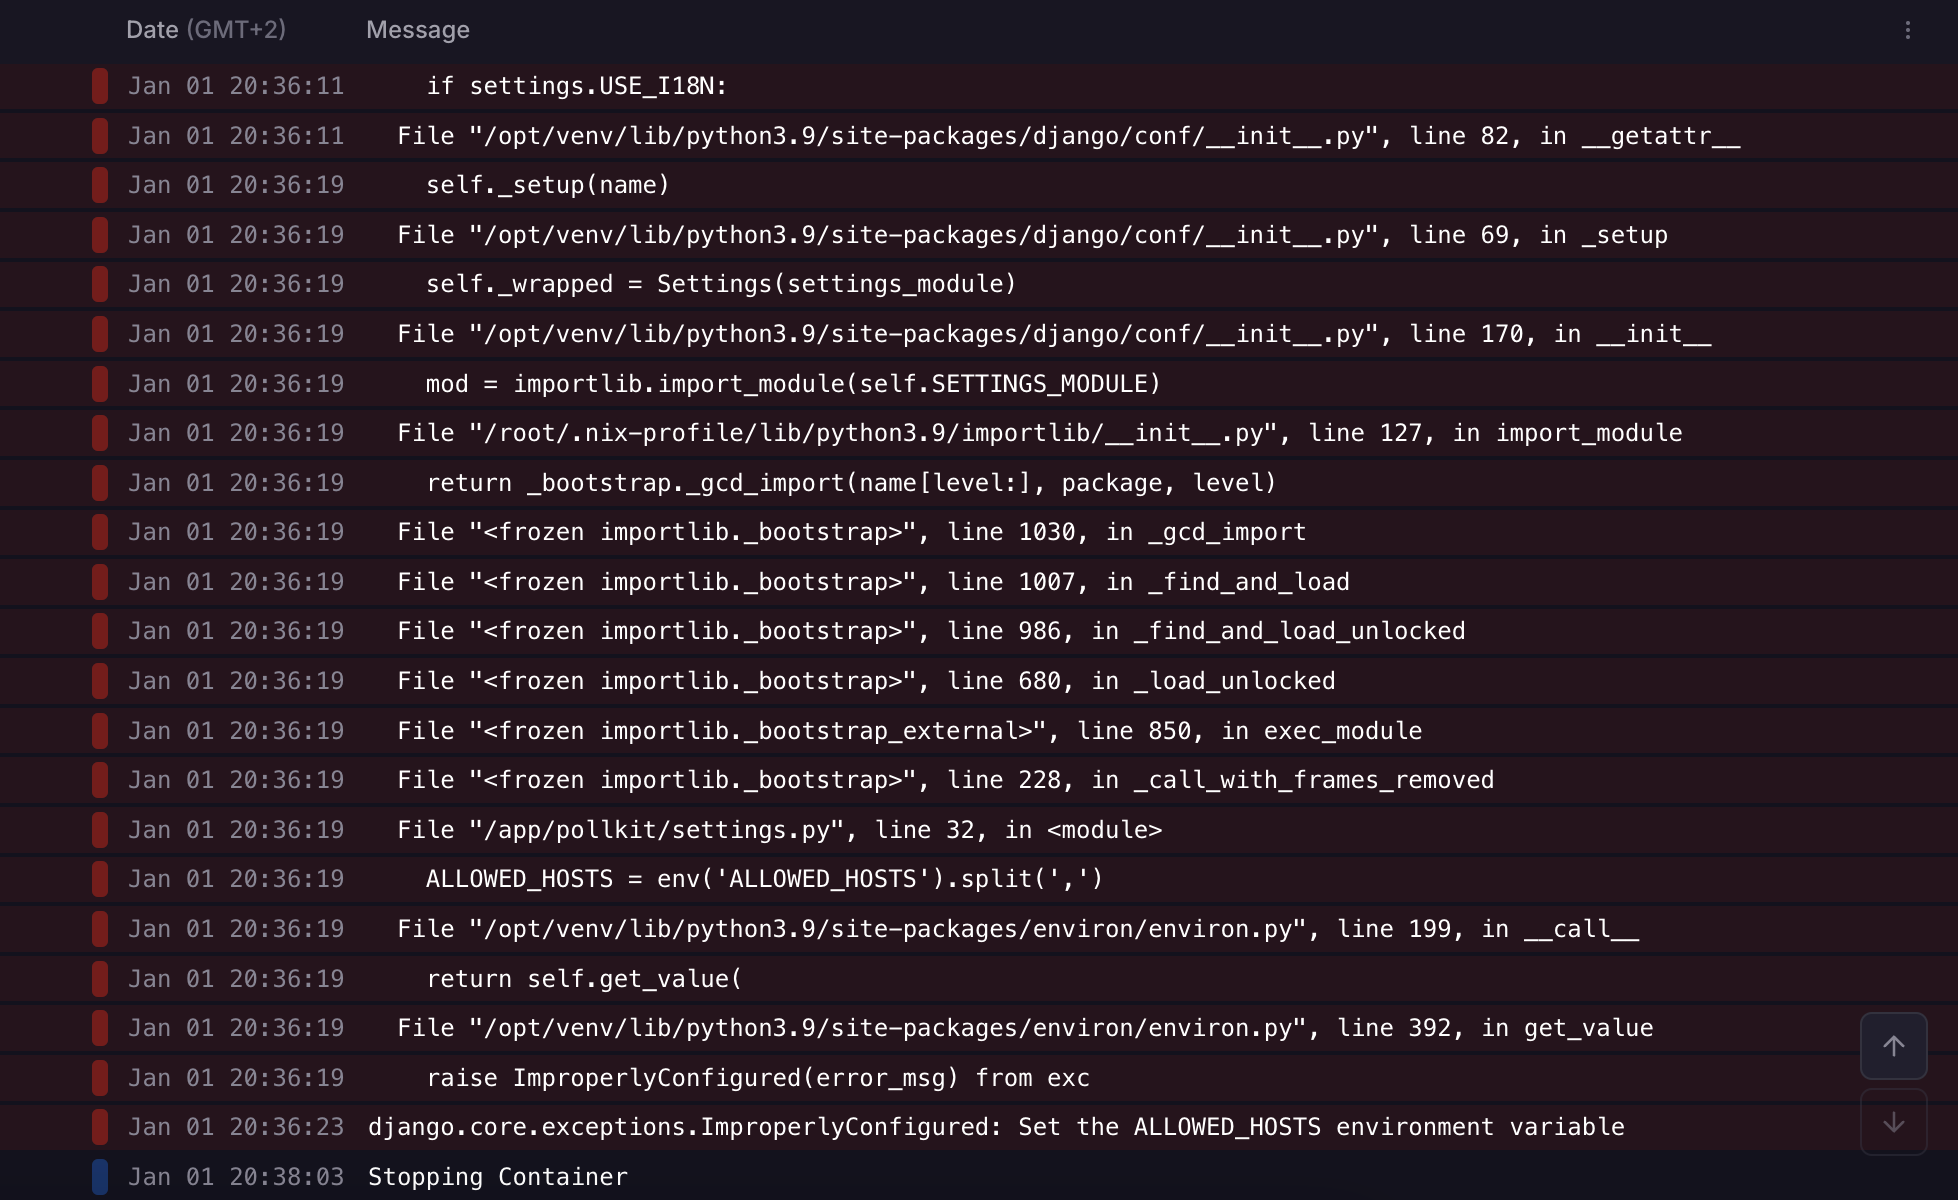
If you ever see a deployment has crashed in Railway, click on it and you will be shown the Build or Deploy logs. Check the logs to see what the issue is and fix it. For example, here's a deployment that was missing an environment variable.

Pushing updates
Now whenever you send a commit to GitHub, Railway will create a new deployment. Super simple 🔥 No more fiddling with servers.
You will get an email from Railway if a deployment fails, and you can always check errors from the logs for each deployment.
Cost
I have been running a few projects on Railway and have noticed that costs for a project like ilo are less than what I would have spent on a VPS, albeit with not a ton of traffic. My ilo bill for December was $3.98. For The Matchball and Matchday Brief (both running from the same Django project) I paid $4.01.
Subscribe to the newsletter
Join 90+ members and get my new blog posts in your inbox.
Comments
Please subscribe or sign in to join the conversation!